Energy-Efficient Upgrades: Transform Your Home and Save on Utility Bills

As the world becomes more conscious of energy consumption, homeowners are increasingly seeking ways to reduce their carbon footprints and save on utility bills. Energy-efficient upgrades are a smart investment that not only benefit the environment but also make your home more comfortable and cost-effective. From insulation improvements to modern windows, there are a variety of upgrades that can help lower your energy consumption and improve your home’s performance. In this article, we’ll explore the most popular energy-efficient upgrades you can make to your home and how they can help you save in the long run.

1. Start with Proper Insulation

The first step to achieving an energy-efficient home is ensuring that your insulation is up to date. Insulation helps keep your home at a comfortable temperature by reducing heat loss in the winter and keeping cool air inside during the summer. Without proper insulation, your heating and cooling systems have to work harder, leading to higher energy bills.

Consider upgrading attic, wall, and floor insulation to improve your home’s energy efficiency. Spray foam insulation, fiberglass batts, and blown-in cellulose are popular materials that provide excellent thermal resistance. Insulating your home properly also reduces strain on HVAC systems, extending their lifespan and improving your overall comfort.

2. Energy-Efficient Windows

Old, drafty windows are a significant source of energy loss in many homes. Replacing outdated windows with energy-efficient models can drastically improve your home’s insulation. Modern windows come with a variety of features designed to reduce energy loss, including double-glazed glass, Low-E coatings, and gas fills like argon, which help to reduce heat transfer.

Energy-efficient windows can keep your home warm during the winter and cool during the summer, reducing your reliance on air conditioning and heating systems. While the initial cost of window replacement can be significant, the long-term savings on utility bills and the added comfort make it a worthwhile investment.

3. Upgrade to Energy-Efficient Appliances

One of the easiest ways to reduce your home’s energy consumption is by replacing old appliances with newer, energy-efficient models. Energy-efficient appliances, such as refrigerators, dishwashers, washing machines, and dryers, consume less electricity and water, making them eco-friendly and budget-friendly.

Look for appliances that are certified by ENERGY STAR, which indicates that they meet strict energy efficiency standards. These appliances are designed to use less energy without sacrificing performance, helping you save money in the long run. For example, an ENERGY STAR-rated refrigerator can save you hundreds of dollars over its lifespan compared to a non-efficient model.

4. Smart Thermostats for Temperature Control

A smart thermostat is one of the easiest ways to save energy and money. Unlike traditional thermostats, which require manual adjustments, smart thermostats learn your home’s temperature patterns and adjust automatically to optimize energy use. You can also control smart thermostats remotely via a smartphone app, ensuring your home is always at the perfect temperature without wasting energy.

By programming your smart thermostat to lower the temperature while you’re away or sleeping, you can significantly reduce heating and cooling costs. Some models even have features like geofencing, which adjusts the temperature when you’re nearby, further optimizing your energy savings.

5. Energy-Efficient Lighting

Switching out your old incandescent light bulbs for LED bulbs is a simple yet effective upgrade for any home. LED bulbs use up to 75% less energy than incandescent bulbs and can last up to 25 times longer, making them a cost-effective lighting option in the long run.

Additionally, you can install motion sensors or dimmer switches to reduce unnecessary energy usage. By automatically turning off lights when no one is in the room or adjusting their brightness, you can save even more energy while still maintaining an inviting atmosphere in your home.

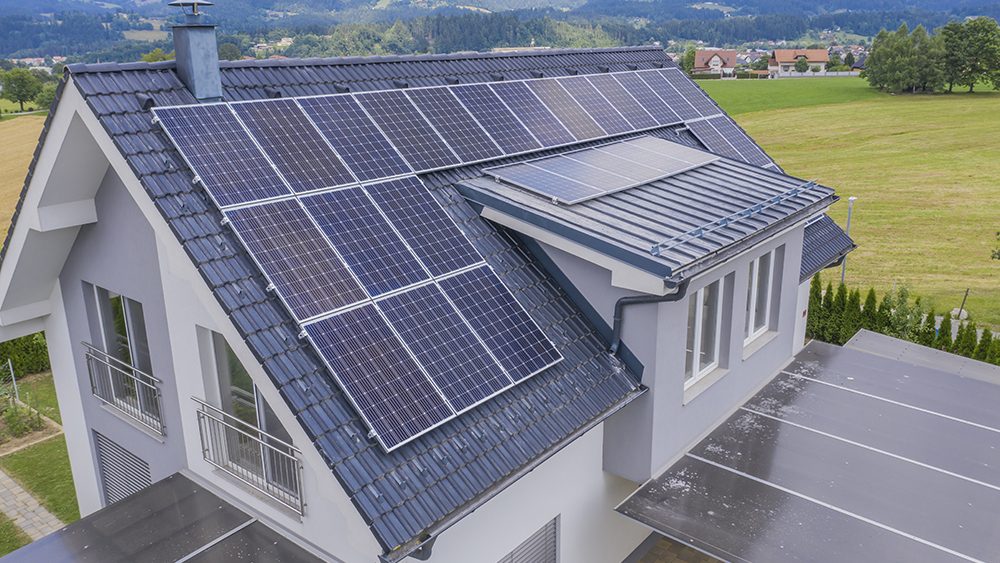
6. Solar Panel Installation

For homeowners looking to take energy efficiency to the next level, installing solar panels is a powerful upgrade. Solar energy systems harness the power of the sun to generate electricity for your home, reducing your reliance on traditional energy sources and lowering your utility bills.

While the upfront costs of solar panel installation can be high, federal and state incentives, tax credits, and rebates can significantly reduce the cost of installation. Over time, solar panels can save you thousands of dollars on electricity bills and increase your home’s value.

7. Seal Air Leaks and Gaps

Air leaks around doors, windows, and ducts can account for a significant amount of energy loss. By sealing gaps and cracks, you can improve your home’s insulation and reduce the workload on your heating and cooling systems.

Caulking and weatherstripping are simple and affordable solutions for sealing air leaks. You can also consider using foam sealants or spray foam insulation to fill larger gaps. Sealing air leaks is a quick and easy way to make your home more energy-efficient without requiring a major renovation.

8. Upgrade Your Water Heater

Water heating can account for a significant portion of your energy bill. Upgrading to an energy-efficient water heater, such as a tankless water heater or a solar water heater, can significantly reduce your energy usage.

Tankless water heaters, also known as on-demand water heaters, only heat water when it’s needed, reducing energy waste. They are more compact and efficient than traditional storage water heaters, which continuously heat and store water. Solar water heaters use the sun’s energy to heat water, providing an environmentally friendly and cost-effective option for homeowners looking to reduce their energy consumption.

9. Landscaping for Energy Efficiency

Did you know that the landscaping around your home can also impact your energy efficiency? Planting trees and shrubs strategically can help provide natural shade and windbreaks, reducing the need for air conditioning during hot months and lowering heating costs during the winter.

Deciduous trees, which lose their leaves in the winter, are ideal for shading your home in the summer while allowing sunlight to warm your home in the winter. Consider consulting a landscaping professional to design an energy-efficient landscape that works in harmony with your home’s natural surroundings.

Conclusion: Start Your Energy-Efficient Upgrade Today

Making energy-efficient upgrades to your home is a win-win situation. Not only do these improvements help reduce your carbon footprint, but they also lower your utility bills, making your home more comfortable and affordable to live in. Whether you’re updating your insulation, installing energy-efficient windows, or adding solar panels, each upgrade brings you one step closer to a more sustainable and cost-effective home. Start planning your energy-efficient upgrades today and enjoy the benefits for years to come.

Energy-Efficient Upgrades: Transform Your Home and Save on Utility Bills

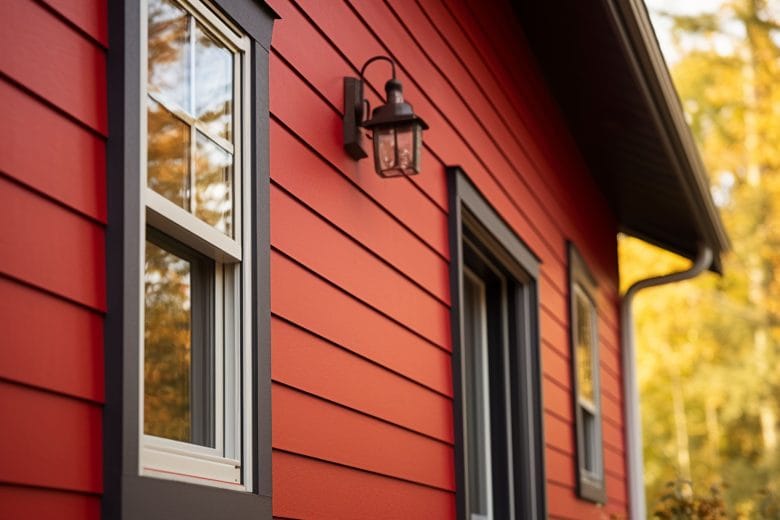
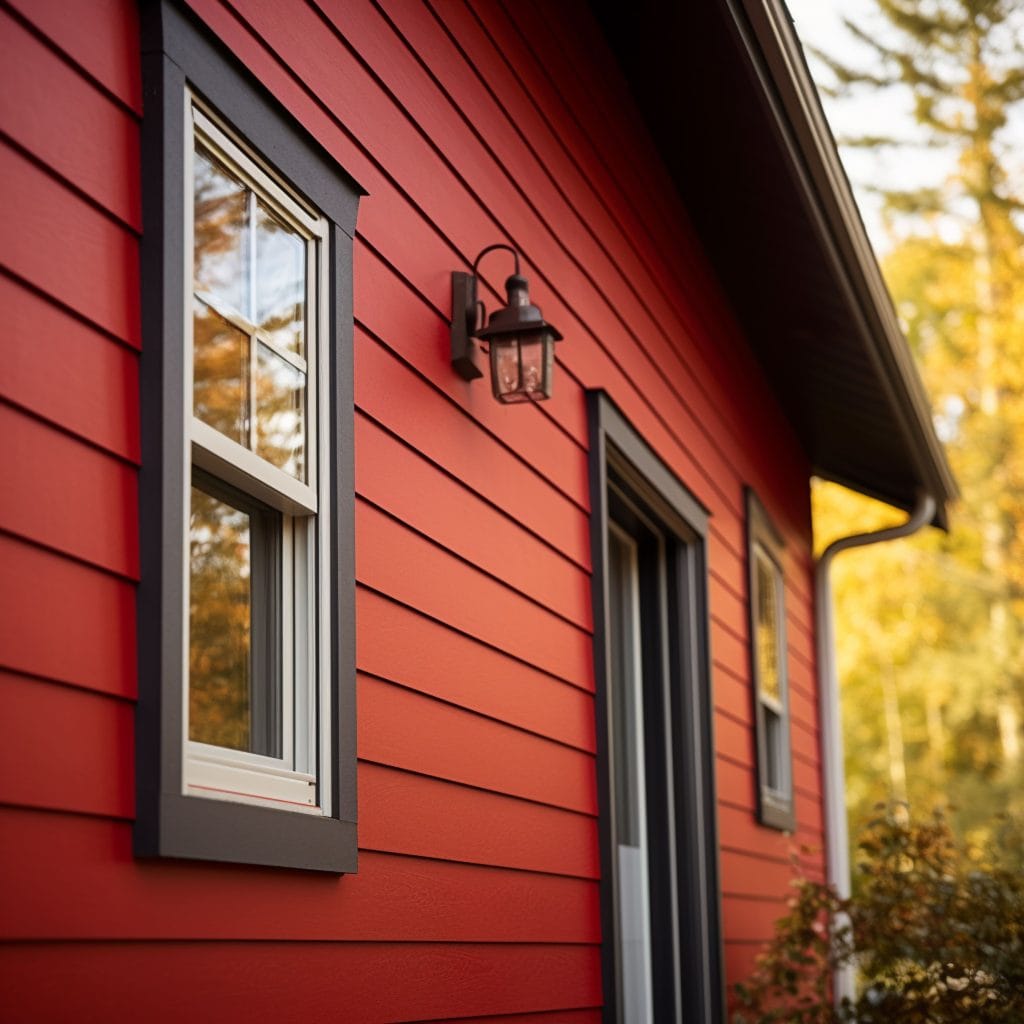
Siding Repair: The Key to Maintaining Your Home’s Exterior

When it comes to maintaining your home, siding plays an essential role in protecting your property and enhancing its curb appeal. Over time, however, siding can suffer from wear and tear due to weather, pests, or general aging. If you notice cracks, warping, or fading, it might be time for some siding repair. Addressing these issues early can save you money and protect your home from further damage.

Why Siding Repair Is Important

Siding is your home’s first line of defense against the elements. It shields your house from rain, wind, sun, and even pests. As the exterior of your home, siding can become damaged over time, especially in areas with extreme weather conditions. Repairing your siding promptly is critical for several reasons:

  1. Preventing Water Damage
    One of the most significant threats to your home is water infiltration. Cracked or damaged siding can allow water to seep into your walls, leading to mold, mildew, and rot. Repairing damaged siding prevents this water damage, which can be costly to fix in the long run.

  2. Maintaining Energy Efficiency
    Damaged siding can also affect your home’s insulation. Gaps or cracks allow air to escape, making it harder to keep your home warm in the winter and cool in the summer. This results in higher heating and cooling bills. Repairing your siding helps maintain your home’s energy efficiency, which can save you money on utility bills.

  3. Enhancing Curb Appeal
    Your home’s exterior plays a big role in its curb appeal. Damaged or worn-out siding can make your home look neglected, even if the rest of the property is well-maintained. Repairing your siding helps improve your home’s appearance, making it more attractive to visitors or potential buyers if you’re looking to sell.

  4. Preventing Further Damage
    If you ignore small issues with your siding, they can worsen over time. A minor crack or hole can turn into a bigger problem if left unchecked. Early siding repair can prevent these small problems from escalating into costly, more extensive damage.

Common Siding Problems and How to Repair Them

Siding problems can come in many forms, but most can be addressed with simple repairs. Here are some of the most common issues homeowners face with their siding and how to fix them:

  1. Cracked or Broken Panels
    If your siding panels are cracked or broken, they need to be replaced to prevent further damage. For vinyl or fiber cement siding, this typically involves removing the damaged panel and installing a new one in its place. Be sure to match the color and texture of the existing siding for a seamless repair.

  2. Loose or Warped Siding
    Over time, siding can become loose or warped due to changes in temperature or humidity. Loose siding can be reattached with nails or screws. Warped siding, however, may need to be replaced. In some cases, the warping may be a result of underlying issues like moisture buildup, which should be addressed before reattaching or replacing the siding.

  3. Fading or Discoloration
    Exposure to sunlight, rain, and other environmental factors can cause siding to fade or discolor. In some cases, a simple power wash can restore the color of your siding. For more significant fading, you may need to repaint or re-stain the siding. If you have vinyl siding, it’s important to use a paint that is compatible with vinyl materials to avoid damaging the surface.

  4. Holes and Dents
    Siding can get dented or punctured by falling debris, hail, or impact from animals. If you notice small holes or dents in your siding, they can often be patched. Use caulk or a patching compound for minor holes, or replace the affected panel for larger damage. Be sure to inspect the surrounding area to ensure the damage hasn’t spread or caused underlying issues.

  5. Moisture and Mold Damage
    Moisture damage is a serious issue when it comes to siding. If you notice mold or mildew on your siding, it’s important to clean it promptly to prevent further growth. A mixture of water and bleach can be used to clean most types of siding. However, if the mold has caused damage to the siding itself, you may need to replace the affected panels to prevent further mold growth inside your home.

Professional vs. DIY Siding Repair

While minor siding repairs can be handled by homeowners with some basic tools, larger repairs or replacements may require the expertise of a professional. Here’s a breakdown of when to consider doing the repair yourself or calling in the experts:

  • DIY Siding Repair:
    If you have some experience with home repairs and the damage is relatively minor (e.g., small cracks, holes, or cleaning issues), you can likely handle the repair on your own. Ensure you have the proper tools and materials before starting, and always follow safety guidelines.

  • Professional Siding Repair:
    If the damage is extensive or if you’re unsure about tackling the repair, it’s best to call in a professional. Siding repair experts have the experience, tools, and knowledge to complete the job correctly and efficiently. Additionally, they can identify underlying issues that you may not have noticed, such as mold or structural damage.

How to Prevent Siding Damage in the Future

Preventing damage is always easier than repairing it. Here are some tips to keep your siding in top condition for years to come:

  • Regular Cleaning:
    Power wash your siding annually to remove dirt, debris, and mildew buildup. This helps prevent staining and discoloration.

  • Inspect for Damage:
    Regularly inspect your siding for cracks, warping, or signs of damage. Catching issues early makes them easier and less expensive to repair.

  • Trim Vegetation:
    Keep bushes, trees, and vines trimmed to prevent them from rubbing against your siding or causing moisture buildup.

  • Seal Cracks:
    If you notice small cracks or holes, seal them promptly to prevent moisture from entering your home and causing damage.

Conclusion

Siding repair is an essential part of home maintenance. Whether you’re dealing with cracked panels, fading, or moisture damage, addressing siding issues quickly can save you money and protect your home from further damage. Whether you decide to tackle the repair yourself or call in the experts, timely maintenance is the key to keeping your home’s exterior looking great and performing well for years to come.

Siding Repair: The Key to Maintaining Your Home's Exterior

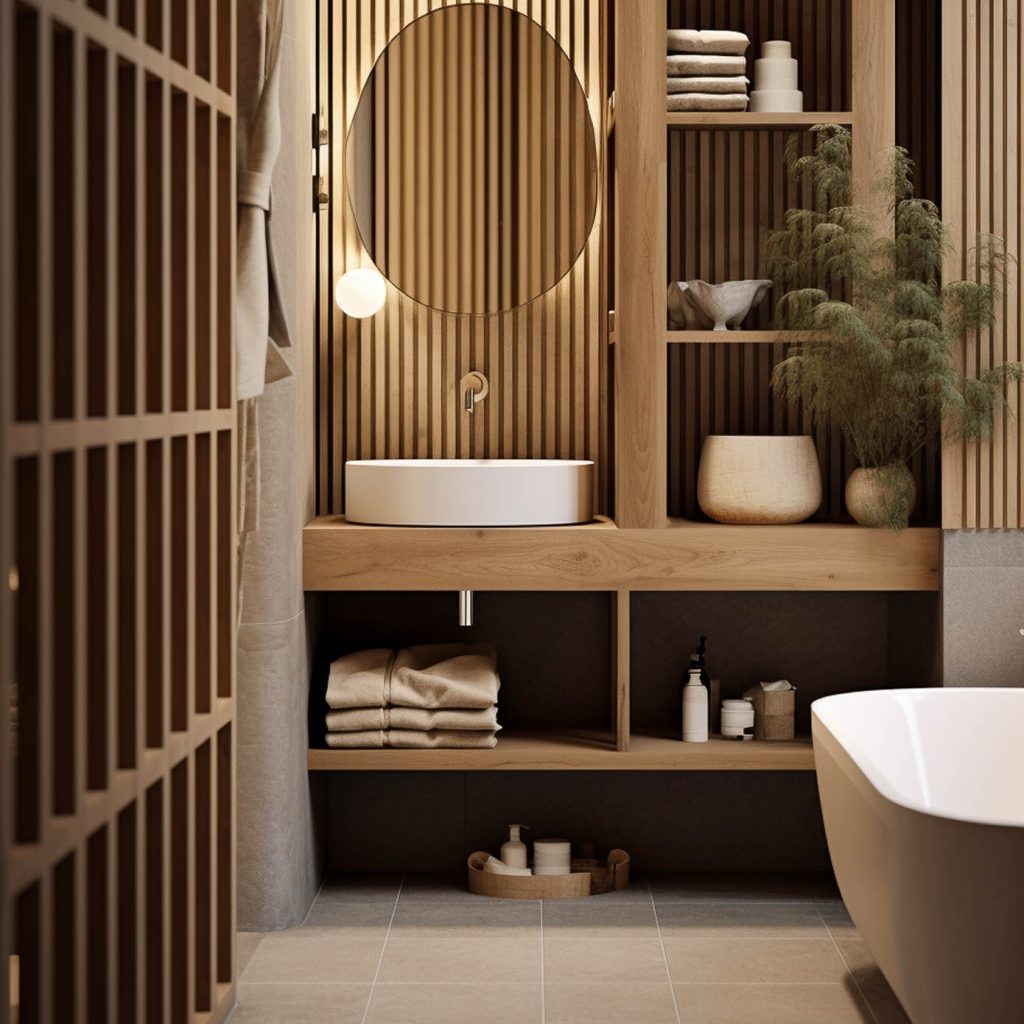
Lighting Installation: Transforming Your Bathroom with the Right Illumination

Lighting is one of the most essential elements in any bathroom remodel, as it affects both functionality and ambiance. Proper lighting creates a bright and welcoming space, enhances safety, and adds sophistication. When updating bathroom lighting, consider factors like the types of fixtures, placement, and brightness to create a well-lit and beautiful space.

In this article, we’ll explore different bathroom lighting options, how to select the right lighting for your space, and key installation tips.

Why Update Bathroom Lighting?

Updating your bathroom lighting can elevate the room in several ways:

  1. Improved Functionality
    Proper lighting makes tasks like shaving, applying makeup, or getting ready in the morning much easier and more accurate.

  2. Enhanced Ambiance
    Lighting influences mood. Bright, natural tones create an energizing atmosphere, while dimmable lights can turn the space into a relaxing retreat.

  3. Increased Value and Appeal
    High-quality lighting is a desirable feature for homeowners and potential buyers alike. Updated lighting can also make the bathroom feel more spacious and luxurious.

  4. Energy Efficiency
    Modern LED lights use less energy and have longer lifespans than traditional bulbs, which helps save on energy bills and reduces the need for frequent replacements.

Comparing Bathroom Lighting Options

Choosing the right lighting for your bathroom involves understanding different lighting types, each serving specific purposes:

  1. Vanity Lighting
    Vanity lights are typically placed above or beside the mirror to provide bright, focused light. Side-mounted sconces at eye level can reduce shadows on the face, while overhead fixtures add general illumination.

  2. Ceiling Lights
    Recessed lights or flush-mount ceiling fixtures provide general lighting across the bathroom. Recessed lights are a good option for bathrooms with lower ceilings, while pendant lights can add style in larger bathrooms.

  3. Accent Lighting
    Accent lighting, like strip lights along shelves or backlit mirrors, adds depth and highlights design elements. Accent lights are perfect for creating a spa-like atmosphere.

  4. Shower and Tub Lighting
    Water-resistant lights designed for wet areas are essential for lighting the shower or bathtub safely. Recessed waterproof lights provide focused illumination while protecting against moisture.

  5. Natural Light Enhancements
    If possible, consider ways to maximize natural light, such as installing skylights or larger windows. Natural light provides a warm and refreshing feel that complements artificial lighting.

Selecting the Right Lighting for Your Bathroom

When choosing lighting fixtures, keep the following factors in mind to ensure the best results:

  1. Bathroom Size and Layout
    In smaller bathrooms, fewer lights may be needed to achieve adequate brightness. In larger bathrooms, layering light with a combination of ceiling, vanity, and accent lights helps illuminate the space effectively.

  2. Lighting Temperature and Brightness
    Light temperature is crucial for creating the desired mood. Cooler light temperatures (around 4,000K) are ideal for task lighting, while warmer lights (2,700K to 3,000K) add a relaxing ambiance. Dimmable options give you the flexibility to adjust brightness as needed.

  3. Design Style
    Select lighting fixtures that complement the bathroom’s overall design theme. Sleek, minimalist fixtures pair well with modern bathrooms, while decorative sconces add character to traditional spaces.

  4. Energy Efficiency
    LED lights are the most energy-efficient option, offering long-lasting performance with minimal energy usage. Many modern LED fixtures are also dimmable, giving you control over light intensity.

Tips for Proper Lighting Installation

Proper installation ensures that lighting fixtures not only look good but also function safely and effectively. Here are some key considerations:

  1. Placement of Vanity Lights
    For optimal mirror lighting, mount sconces or fixtures at about 36 to 40 inches apart, around eye level (approximately 65 to 70 inches from the floor). This setup helps eliminate shadows and ensures even lighting for grooming tasks.

  2. Safe Installation in Wet Areas
    Any light fixture in close proximity to water sources, like a shower or bathtub, should be moisture-rated or waterproof. Ensure these lights have the appropriate rating to prevent issues related to water exposure.

  3. Use of Dimmers
    Install dimmer switches for flexibility in lighting levels. Dimmers allow you to create different moods in the bathroom, from bright task lighting to a soft, relaxing glow.

  4. Considerations for Recessed Lighting
    Recessed lighting is ideal for ceilings in showers, bathtubs, and other areas requiring moisture-resistant options. Space the lights about two to three feet apart for an even spread, and avoid placing them directly over the vanity mirror, as it can create shadows.

  5. Professional Installation
    While changing a bulb is a simple task, installing new lighting fixtures requires expertise to ensure safe wiring, especially in wet areas. Hiring a licensed electrician ensures that the work is up to code and prevents potential hazards.

Estimated Costs for Bathroom Lighting Installation

Bathroom lighting costs vary widely based on fixture types and installation complexity. Here’s a rough breakdown:

  • Vanity Lights: $50 to $300 per fixture
  • Ceiling Lights: $100 to $500 (recessed lights cost more if wiring adjustments are needed)
  • Accent Lighting: $50 to $200
  • Shower/Tub Lighting: $100 to $300
  • Professional Installation: $100 to $250 per fixture, depending on complexity and location

Final Thoughts on Updating Bathroom Lighting

Bathroom lighting is essential for both functional and aesthetic reasons. By choosing the right combination of vanity, ceiling, and accent lighting, you can create a bathroom that’s both practical and inviting. Considerations like energy efficiency, dimming capabilities, and moisture ratings add convenience and durability to your lighting setup. For best results, professional installation will ensure that your new lighting is safe, code-compliant, and perfectly suited to your bathroom’s unique layout.

Lighting Installation: Transforming Your Bathroom with the Right Illumination

Kitchen Countertops: Choosing the Right Surface for Your Remodel

When remodeling your kitchen, the countertops are often the centerpiece of the space. They are not only functional, serving as the workspace for meal prep and cooking, but also contribute greatly to the overall style and aesthetic of the room. With so many materials to choose from, deciding on the perfect countertop can feel overwhelming, but with the right information, it can also be an exciting part of your remodel.

Let’s explore the top kitchen countertop materials and why they might be the right fit for your home.

What Makes a Great Kitchen Countertop?

Before we dive into the different types of countertops, it’s important to understand what makes a great countertop. A good countertop should be:

  • Durable: It should withstand the daily wear and tear of cooking and cleaning.
  • Easy to Maintain: You want a countertop that’s easy to clean and maintain.
  • Stylish: Your countertop should complement your kitchen’s design and color scheme.
  • Affordable: Countertops can be a significant part of your kitchen budget, so choosing a material that fits your price range is important.

Top Kitchen Countertop Materials

1. Granite Countertops

Granite is a timeless and durable material that’s been a top choice for homeowners for decades. Known for its natural beauty and unique patterns, granite countertops offer both functionality and style. Each granite slab is unique, providing your kitchen with a one-of-a-kind look.

  • Pros:
    • Extremely durable and scratch-resistant.
    • Adds value to your home.
    • Available in a wide range of colors and patterns.
  • Cons:
    • Requires sealing to prevent stains.
    • Can be expensive, especially for high-end varieties.
    • Heavy, which might require additional support for installation.

2. Quartz Countertops

Quartz is an engineered stone, made by combining crushed quartz with resin. It has risen in popularity in recent years due to its versatility and low-maintenance qualities. While it may not have the same natural veining as granite, it can mimic the appearance of marble or other stones and is available in many colors.

  • Pros:
    • Non-porous, so it doesn’t require sealing.
    • Extremely durable and resistant to scratches and stains.
    • Wide range of colors and designs.
  • Cons:
    • Not heat-resistant like granite or marble.
    • Can be more expensive than some other materials.

3. Marble Countertops

Marble countertops are a classic and luxurious option that adds a touch of elegance to any kitchen. The natural veining in marble gives each countertop a unique, artistic appearance. However, marble is more porous than granite and requires regular maintenance.

  • Pros:
    • Stunning visual appeal with unique veining.
    • Adds significant value to your kitchen.
  • Cons:
    • Prone to scratches and stains, particularly from acidic substances.
    • Requires regular sealing and maintenance.
    • More expensive than other materials.

4. Butcher Block Countertops

Butcher block countertops offer a warm, rustic look and are especially popular in farmhouse-style kitchens. Made from wood, these countertops are not only visually appealing but also provide a functional work surface for chopping and food preparation.

  • Pros:
    • Easy to repair – you can sand out scratches and gouges.
    • Adds warmth and a natural feel to your kitchen.
    • Relatively affordable compared to stone options.
  • Cons:
    • Requires regular sealing to protect against moisture and stains.
    • Prone to scratches and dents from knives and heavy objects.
    • Needs maintenance to preserve its appearance over time.

5. Concrete Countertops

Concrete countertops have gained popularity for their modern, industrial look. They are highly customizable in terms of color, texture, and shape, which makes them a great choice for contemporary kitchens. Concrete is also durable, but it needs proper sealing to prevent stains and damage.

  • Pros:
    • Fully customizable to fit your design preferences.
    • Durable and resistant to heat and scratches.
    • Offers a modern, industrial aesthetic.
  • Cons:
    • Requires sealing to prevent stains and cracks.
    • Can be expensive to install and repair.
    • Can be prone to chipping or cracking over time.

6. Laminate Countertops

Laminate countertops are one of the most affordable options available. Made from layers of plastic bonded to a particleboard or MDF base, laminate countertops come in a wide variety of colors and patterns. While not as durable as stone options, they offer a budget-friendly alternative.

  • Pros:
    • Very affordable, especially when compared to stone countertops.
    • Available in a wide range of colors and patterns, including designs that mimic stone.
    • Low maintenance and easy to clean.
  • Cons:
    • Not as durable or long-lasting as stone options.
    • Can be prone to scratching, chipping, and heat damage.
    • Not as aesthetically luxurious as other materials.

7. Soapstone Countertops

Soapstone is a natural stone that is durable, heat-resistant, and has a smooth, soft feel. It is often used in rustic or country-style kitchens, and it develops a patina over time that enhances its natural beauty.

  • Pros:
    • Heat-resistant and non-porous.
    • Develops a unique patina over time.
    • Low-maintenance – doesn’t need sealing.
  • Cons:
    • Softer than granite, so it may scratch more easily.
    • Limited color options, usually in shades of gray or green.

Choosing the Right Countertop for Your Kitchen

When selecting the right countertop for your kitchen, consider the following factors:

  • Style and Aesthetics: Your countertop should complement your kitchen’s overall design and color scheme. Do you want a modern, sleek look, or are you drawn to more rustic, natural materials?
  • Durability: Think about how much wear and tear your countertops will face. Will they be used for heavy cooking and meal prep, or are they mainly for aesthetic appeal?
  • Maintenance: Some materials, like granite and marble, require more upkeep than others, such as quartz or laminate, which are low-maintenance.
  • Budget: Countertop materials vary widely in price. Consider your budget and how much you’re willing to spend on this long-term investment.

Conclusion

Choosing the perfect kitchen countertop is an exciting step in your remodel. Each material offers a unique set of benefits and drawbacks, so it’s important to consider your kitchen’s needs and your personal style preferences. Whether you go for the luxurious look of marble, the durability of granite, or the budget-friendly appeal of laminate, your countertop will play a significant role in the overall function and feel of your kitchen. Take your time, do your research, and choose the countertop that best aligns with your vision.

Kitchen Countertops: Choosing the Right Surface for Your Remodel

Determining Bidding Limits of Sacramento Auction Auto Sales.

Sacramento auctionYou can be able to save money by purchasing second-hand vehicles in an auto auction. However, know the amount of money you’ll be planning to spend before sales. This is essential as you wouldn’t want to end up not being able to pay for insurance, taxes and other expenses that accompany the purchase of a second-hand vehicle. When you are purchasing your car from Sacramento auction, have the following in your budget.

  1. Taxes, plates, and additional fees

When you buy a used vehicle, it’s compulsory that you visit the Department of Motor Vehicles (DMV) office, to pay your states sales tax. Before going to Sacramento auction for an auto auction sale, get in contact with the DMV office to know the sales tax rate. Your vehicle price determines the tax sales you will be paying.Sacramento auction

You can be able to estimate sales tax when you know the budget of your vehicle. When you purchase a car from an auction sale, it’s essential to have the tags and license plates. In case the car is replacing your current vehicle, request to transfer the license plate then pay the fee. It’s necessary that you pay a buyer’s fee when you purchase a vehicle from an auto auction.

  1. Insurance

Sacramento auctionThe model and make of your vehicle determine the insurance cost. If you know the type of truck or car to buy, call an insurance agent to know the estimated insurance cost. You will have to pay for the price of the vehicle in full as you don’t need a lender in financing the truck or car.

You are not obliged to get a comprehensive or collision insurance, however, if you won’t be in a position of paying up for repairs in the event of an accident. Extra coverage is ideal, but it is not mandatory. You’ll need to have a liability policy as all states require liability insurance.

Before going to Sacramento auction for a vehicle, ensure that you have the mentioned aspects included in your budget.

4 Ways To Fix Your Phone Screen

fix your phone screenWhen you have a cracked screen, it does not necessarily mean that you’ll need to purchase a new phone. What it means is you can either opt to fix your phone screen or get a new phone. However, the best option is to get to a phone repair shop near me for repairs. As an owner, you shouldn’t ignore even a single crack as it worsens with time leading to a shattered screen.

The fine pieces of glass are dangerous especially with the frequent contact with your fingers and face. The cracks expose your phone to environmental toxins and debris. With time this is bound to affect the functionality and usability of your device. Before making phone repairs, a plastic screen would be ideal.

Ways to fix your phone screen

  1. Getting the mobile provider or phone manufacturer to repair it

fix your phone screenIn case you require a screen repair during the period of your manufacturer’s warranty, they ought to fix your phone screen for you with no charges and within a few hours. However, keep in mind standard limited warranties for companies like Apple and Samsung don’t cover accidents. You should also be aware that out-of-warranty screen repair cost $100 and more.

  1. Trading in your phone

Some vendors are willing to purchase your phone, allowing you to get a new one. Keep in mind; damaged phones will get you 50% of the original price of the phone.

  1. Hiring someone to make repairs

fix your phone screenIf you’re part of a device protection program of your phone’s company, you can be able to make an insurance claim to get the phone repaired by a contract technician. Aside from that looking through the internet will give you a list of iPhone repair near me or generally phone repair near me, you can then pick one that suits you.

  1. Do It Yourself

There are manual websites such as iFixIt that offers tutorials on how to fix your phone screen and other phone repairs. The tutorials come with complete guides, tools to purchase and where you can be able to get them. Buying the tools can be pricey; however, it’s cheaper than getting a new phone.

Factors To Consider When Opting For Sacramento Auction Sales

Factors To Consider When Opting For Sacramento Auction Sales

Sacramento auction Sacramento auction sales is an excellent example of a third party transaction. When you’re acquiring a product, you can opt to buy them from someone else. To do this, you can either use direct trading or third-party trading such as Sacramento auction.

Direct party sales involve the seller and buyer agreeing to meet to make a transaction; the third party requires an anonymous individual included in the process. If you still haven’t attended an auction sale, you should visit one to observe how the operations happen. However the following consist of factors that you should have in mind.

  1. Type

Several types of auction sales are available, which are dependent on the country or industry. Auctions have different procedures that they follow; for instance, others are secretly carried out as the participants write down their bid whereas others are loud.

  1. Reputation

Sacramento auction Doing thorough research on auction sites such as Sacramento auction is vital, just like research that you’ll do before entering into a business. Know whether the auction site has an address, for how long has it been in the market? Does it have customer reviews? Go for a company that is well known and has a good reputation. This ensures that your money will not go to waste.

  1. Items

Sacramento auction You are in a position of selecting the type of auction; this depends on the kind of product you’re buying. When opting for Sacramento auction sales, you ought to know the items they deal with, is it a single product or mixed products.  Depending on the type of item you require, confirm whether the auction offers the exact product you intend to bid on.

When your visiting the Sacramento auction, keep the factors mentioned above in mind, know the type of items they are dealing with, their reputation and type of auction among other factors. Observing these factors ensures that you have a wonderful time while bidding.

Tips On How To Fix Your Phone Screen

fix your phone screenYou can be able to fix your phone screen whether it’s a smartphone or an iPhone. You can opt to make iPhone repairs by contacting professionals or doing it yourself.  In this article, we are going to give you expert’s advice on how to fix your phone screen, whether it’s shuttered or broken.

  1. Fixing it locally

When setting your phone, let’s take for instance an iPhone, recommendations are, you look for iPhone repair near me. In this sense, you’re looking for locally available phone repair shops. This is essential if you have not selected the iCare+ package. Contact a local phone fix near me, to fix the phone screen at a lower price and lesser time.

  1. Replacement

fix your phone screenIn Case you require replacement on your iPhone, it’s vital that you purchase an Apple iCare + package. If you have the package, then you won’t need to worry about phone damages as your device can be fixed or replaced at a minimal cost. To replace or repair an iPhone, you’ll need to contact Apple’s authorized customer care center, as they will guide on the proper channel of replacing or repairing.

The official personnel will be able to help you meet a local service outlet or mail the iPhone to an official service outlet; this depends on which will be easier for you. It’s also vital to note, to fix your phone screen, the cost and charges depend on your device. For instance, iPhone models have different repair prices.

  1. DIY

Are you an expert in imitation? If so you can eliminate the tips mentioned above. You can utilize online sources which are available on websites to fix your phone screen yourself. To do this search for the right video and start imitating the video as you work on your phone.fix your phone screen

The first two options ensure that you have quality phone repair service, but you’ll feel the pinch in your pocket. For the third tip, it requires an individual who is good at imitating as it can destroy your entire phone if you’re not careful. .

Great Tips For Buying a Car At Sacramento Auction

Sacramento auctionCurrently, there are a lot of car auctions in the market all over the world, for instance, we have Sacramento auction. This is because of individuals who are opting for online bidding and auctions for purchasing cars from. A car auction is in a position of providing you with a reliable used car, for a lesser price than you can get on a forefront. However, if you’ve not done your research correctly and prepared, you will be at a disadvantage.

Most people prefer to purchase a car from an auction as they are cheap, and there’s a wide range of vehicles to go for. Most used- car garages get their stocks from auctions, this is because; you can easily walk away with a car, saving money from the auction especially if it has few bidders. This is as opposed to purchasing it from a dealer or private seller.

Types of public auctions

  1. Government auctions

Sacramento auctionThese auctions have vehicles that are used by the government offices, for instance, police cruisers. Some people go for these cars, using them as cabs. Schools buses and trucks auctioning also takes place here.

  1. Public auctions

This is an excellent place for purchasing a car; most people going to these auctions have mechanical inclination and training. Therefore, if you’re not in a position of fixing a car, don’t go to a public auction.

Buying tips for cars in Sacramento auction

  1. Inspect the car properly

In Sacramento auction, cars are sold on visual inspection only. Hence, you need to have a look and check out any sign of repairs. You should also use your hands, legs, and nose, not just your eyes. Don’t go for a musty car.

  1. Know the car value before bidding

There are so many online resources that can give you an idea of much a used car can go for. Take time also to check local prices on the classified listings.

  1. Pull the dipsticks

Sacramento auctionWhile at Sacramento auction, when purchasing a car check on the maintenance of the car. You can do this by pulling the oil or transmission fluid dipstick; if it’s clear and clean, then the car is well maintained.

The next time you are buying a car in Sacramento auction, you know the aspects to look into. You can also get help from an expert to get the most from your investment.


To Fix Your Phone Screen Frozen Window

fix your phone screenMobile phones are an excellent amenity; however, they can at times be problematic. One of the most common problems with window mobile phones is their frozen screen, therefore, making it essential to know how to fix your phone screen with a frozen window. When a cell phone screen freezes, it tends to be quite frustrating, especially if you’re in the middle of a power-point presentation or placing an online shopping order. When you have a phone screen freeze, you can utilize the following methods to fix the frozen window.


It’s essential to fix your phone screen so that you can get it back to a working condition. When a mobile window system encounters a problem, the screen of the phone can stop loading or freeze. You will need to carry out a hard reset or soft reset, which depends on the responsiveness of your phone. A hard reset unfreezes the mobile phone and restores it to factory setting, whereas a soft reset unfreezes the cell phone.

How to implement a soft reset to fix your phone screen frozen windowfix your phone screen

  1. Connect the phone to a charger and let it charge for 5 minutes
  2. Turn off the phone by pressing the power button
  3. Choose power off to reset the process
  4. If the phone isn’t responding remove the battery
  5. Wait for 5 minutes
  6. Restore the battery into the battery compartment
  7. Press the power button
  8. Your phone should turn on

How to implement a hard reset to fix your phone screen frozen window

  1. Start from the window start menu if possible
  2. Slide your phone screen to the left
  3. Select “About” in the settings
  4. Then select reset phone
  5. Press yes to confirm your selection
  6. The phone ought to reset to its factory status.

fix your phone screenKeep in mind to fix your phone screen frozen window by selecting hard reset, will delete all your contact information and saved data. You, therefore, do this only when the need arises. Make consultations to certified phone repair experts to get accurate suggestions and advice, in regards to a hard reset for smartphones, window phones, and iPhones.